
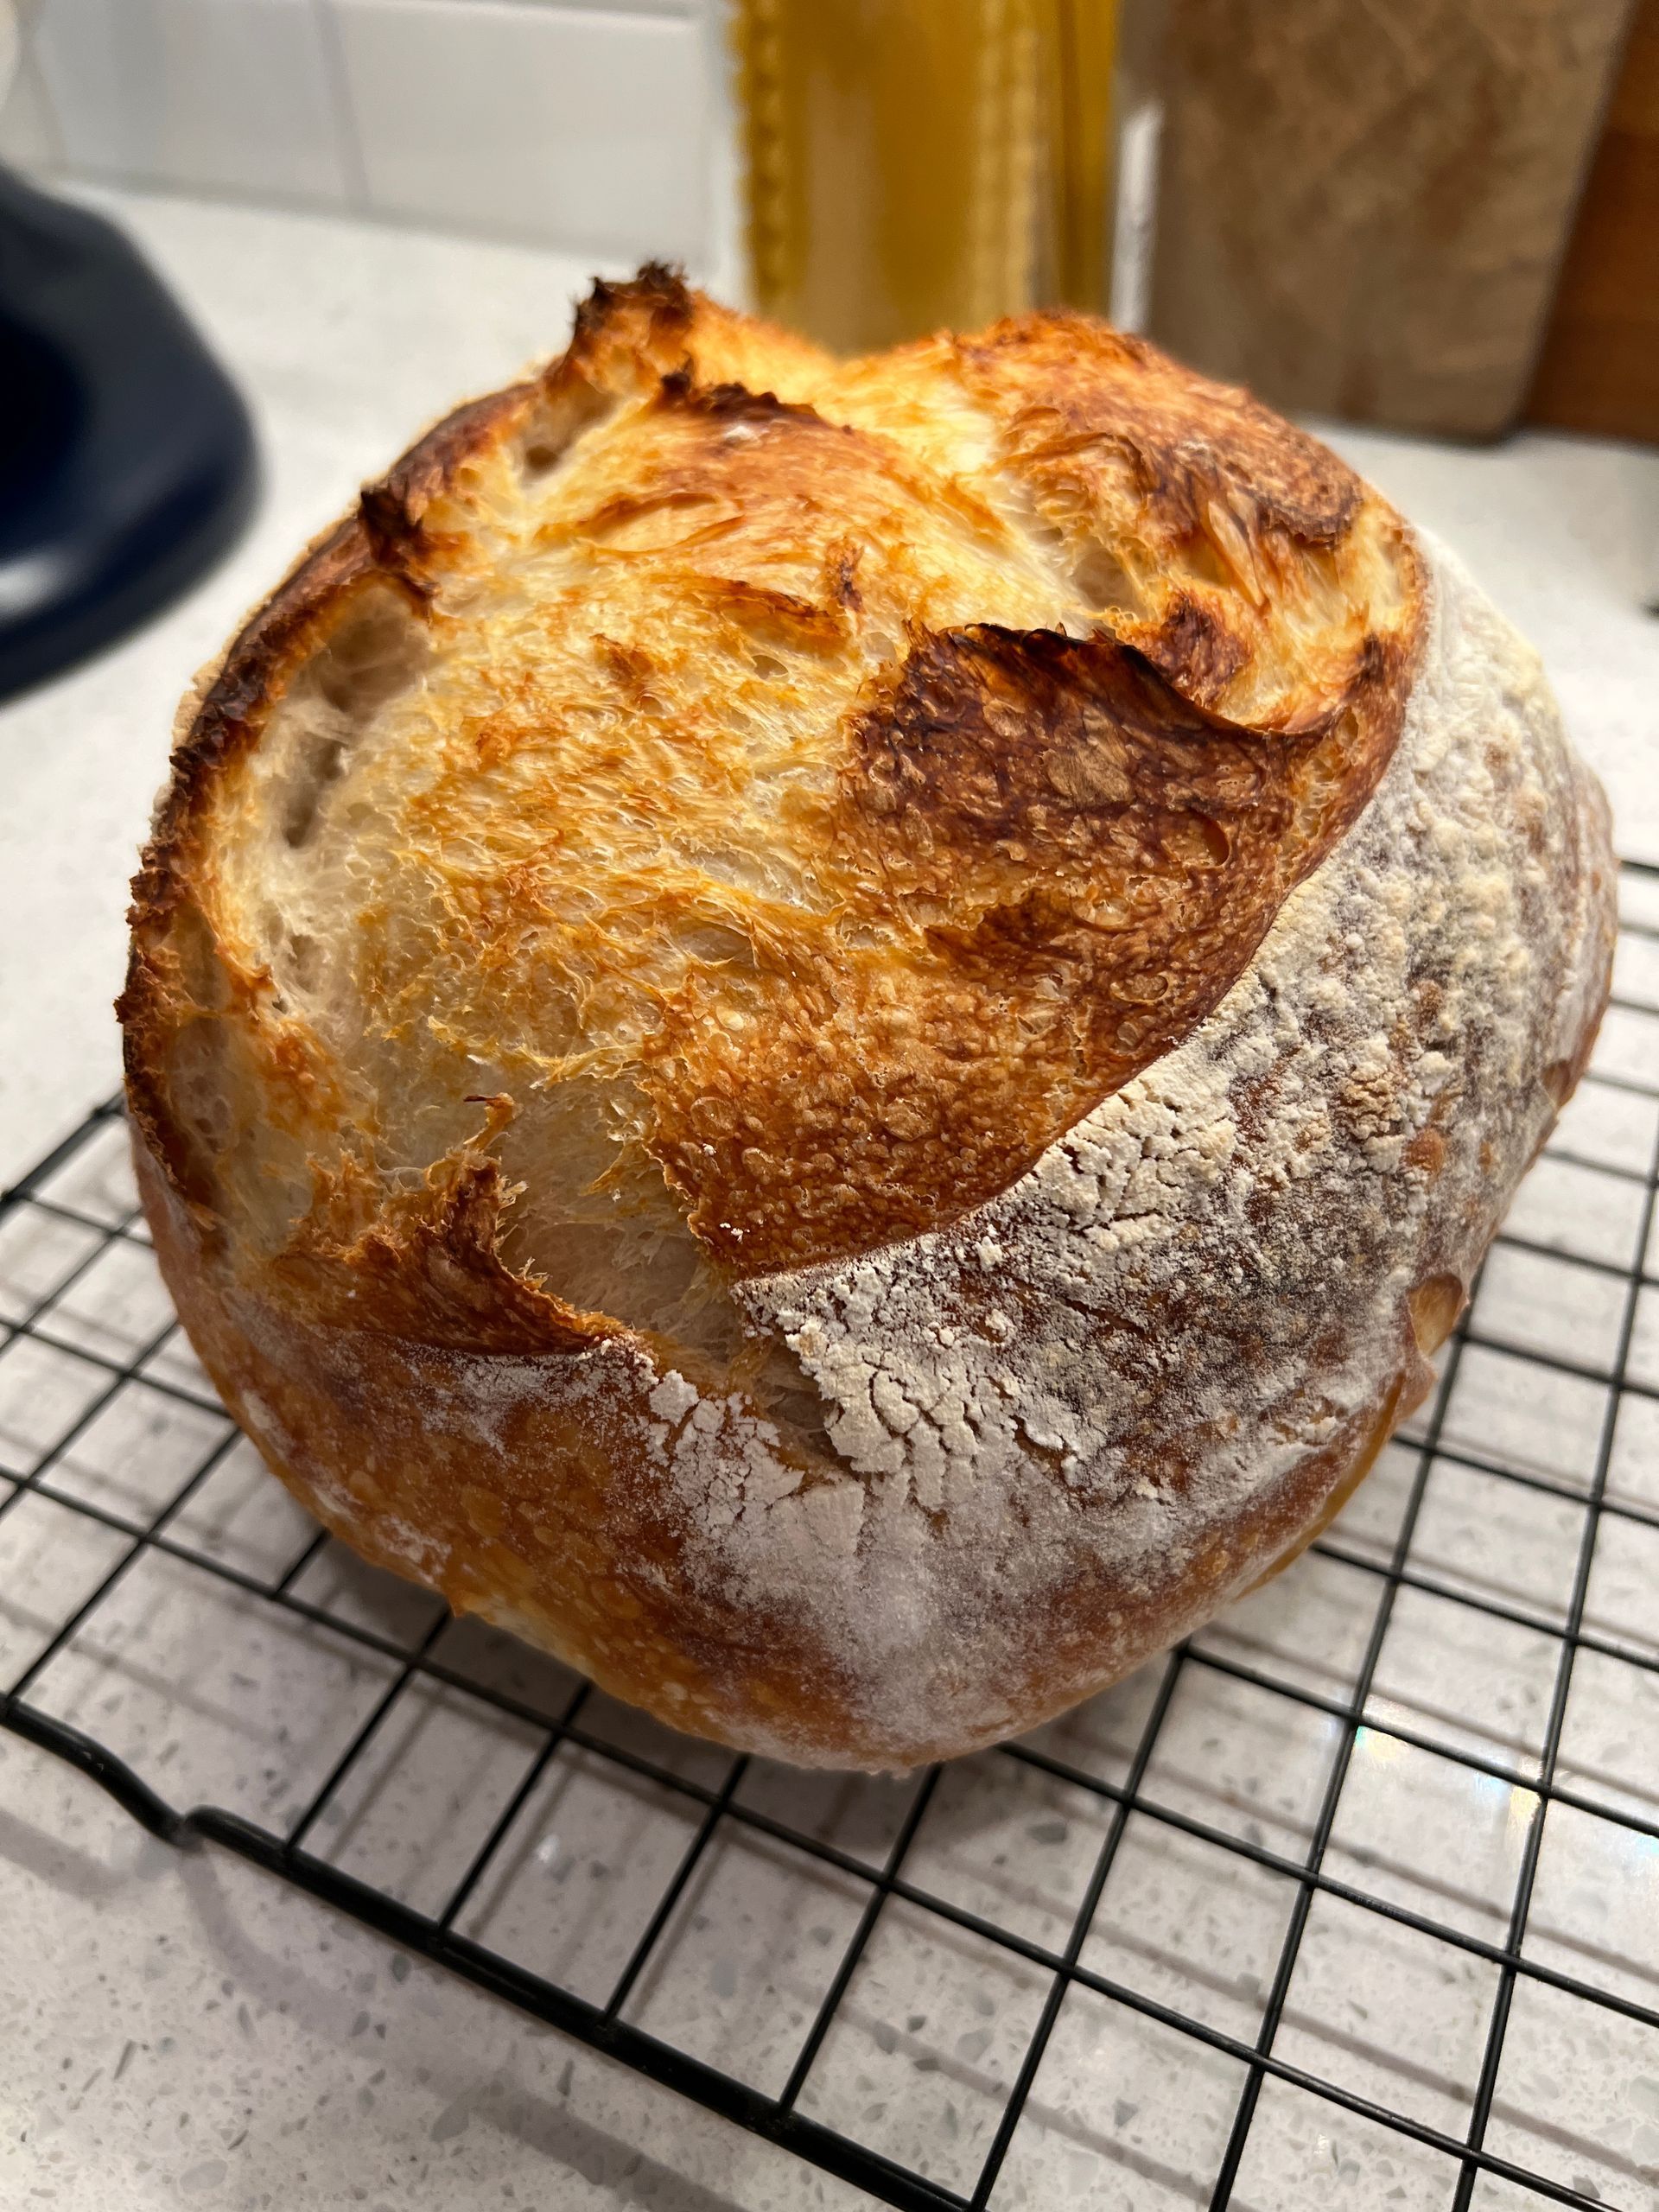
My Signature Sourdough
Just some flour, water, salt and sourdough starter.
Yes, it is that good. And here's a sneaky little tip.
An extraordinarily delicious bread that'll leave you wanting a slice for every bite. Pairs well with soups, stews or just about any dinner occasion you can think.
I can't tell you how many times I'd wish I'd frozen a loaf to pull out of the freezer to thaw for dinner. Lesson learned! Now, I always have a loaf on hand ;)
Now, let's do it!
INGREDIENTS
- 500 g bread flour (incorporate other flours like wheat by decreasing bread flour amounts and adding in other flour(s) of choice. Just be sure to equal 500 g in total)
- 60-90 g ripe sourdough starter
- 325-350 g water
- 12 g sea salt
INSTRUCTIONS
- Combine the flour, water, sourdough starter and salt. Once combined, cover and wait 15 minutes.
- Begin a series of stretch and folds for the next two hours, spaced 30 minutes apart.This will strengthen the gluten of the loaf.
- After the stretch and folds, transfer to a straight-sided container or large bowl and allow to rise during this first fermentation process (called bulk fermentation). Allow to rise 1.5 x its size.
- Once bulk fermentation is finished (which will depend on the temperature - warmer temps will equal shorter proofing time; a cooler environment will mean longer proofing times), it's time for shaping. Remove from the container or bowl and transfer to a floured surface. Shape into a boule (round) or batard (oblong) loaf using your bench scraper. Cover the loaf and let rest for 15 minutes. Once it has relaxed, shape again just as before. Only this time, when finished, transfer to a floured banneton, cover with a tea towel, and wait until a "poke" test reveals it is ready to move into the refrigerator, covered and ready to settle in for 24-36 hours.
- Following the long hibernation, it's almost time to bake! Heat the oven to 500° and place your bread oven, dutch oven or other vessel inside to heat up. When the oven comes to temp, pull the loaf out. Place a plate with a piece of parchment paper on top of the banneton, and flip the banneton upside down so the loaf gently drops onto the plate. Score the loaf to your creative heart's liking.
- Bake for 20 minutes at 500°, covered. Afterward, remove the lid of the bread oven and bake for another 15 minutes, uncovered, at 450°.
- Once the loaf has reached a perfectly golden brown and an internal temperature of about 190-200°, remove and let cool for 10-15 minutes. Transfer to a wire rack to continue cooling. Though tempting, wait until the loaf has completely cooled before slicing in!
A few thoughts and some reviews.
Looks great. Nice distribution of air pockets. Doesn't' look doughy. I'll take loaf next time you bake! 😍 -Trent Boarnet
Looks delicious 😋 You're really mastering the sourdough! -Mary Mathis Lonnevik
"Do not judge me by my successes, judge me by how many times I fell down and got back up again." -Nelson Mandela
What's been cookin' good lookin'?

🚨🚨 Read on for important giveaway news!!! ‼️‼️
#Kitchenknives 🔪 are the backbone of the kitchen. Dice, chop, cut, julienne… they are the tools that make the cooking happen! I’ve been testing a few out. Here is a set by #Shun Japanese knives. A thin blade made with #damascus steel, incredibly sharp and ergonomically fit for the hand.
…
Wie will be testing out more.
…
What is your favorite? ⁉️
…
As we discover our favorite knife, here’s a true @MatzyPlatzy moment! Prep at its best! Win a knife of our choosing for your own best kitchen prep!!!!!
…
Here’s what to do:
…
👍 1) Like this post
✍️ 2) Comment below with your favorite kitchen knife/tool
@ 3) Tag a friend!
✅ 4) Follow @matzyplatzy
#matzyplatzy #knives #giveaway #kitchen #kitchentools #homemade #cook

I was so excited to take a bite of this sandwich from @nytcooking that I forgot to take a picture first!
Talk about end of summer lunches, this is the BEST! Fresh, bright, savory with a sweet twist from the tomato!
The toasted bread brings it all together. Homemade pimento cheese includes grated sharp cheddar, cream cheese, pimentos, jalapeno, cayenne and paprika.
Check it out on MatzyPlatzy.com. Link in bio.
#lunch #matzyplatzy #sandwiches #pimentocheese #tomato #summer #easylunch #creamy #homemade

A special treat all the way from the U.K. Victoria Grey tea. A hint of lavender and rose here snuggles up to the traditional bergamot of her brother, Earl Grey. The result is a subtle citrus with floral profile. A bit of spice, but not too much!
Here, I added a touch of milk to create this beautiful cup of tea, perfect for sipping on a chill evening.
Thanks to @amandachrys14 for the heartfelt gift!
#matzyplatzy #tea #victoriagrey #earlgrey #british #citrus #spice #milk #floral #bergamot

Cherry pie, say whaaaaaaa?!
Yep, just your normal cherry pie made on a Monday in between making Elton his two-tier peanut butter, banana, apple sauce and carrot birthday cake plus dinner….
So yes, you absolutely can make this on a weeknight and still have time to rest and relax!
I’d say you also have time to follow @matzyplatzy for all your food prepping, dessert-making, style guiding and more! C’mon, you know you want to! Let’s go!
#cherrypie #desserts #provisions #preparation #presentation #curated #lifestyle #followus #matzyplatzy #miseenplace #weeknightdinner #weeknightbaking

It was LOVE at first SCENT 🕯️ We stumbled into this cutesie candle store @byjacksonvaughn, in Wimberly TX. I asked if I could move in……..(still waiting for an answer) but in the mean time we settled with The Hemlock from The Signature Collection. This 11.25oz beauty weaves a sensual spell of vintage leather, rich agarwood, mahogany melange, and is collectively cloaked within a delicate tobacco leaf….. you know, all the things you need when you come home 🏠 What’s your favorite scent? Let us know. Comment ⬇️ #leather #tobacco #mahogany #agarwood #jacksonvaughncandles #cutsie #signaturecollection

Tasting tomorrow morning: @katzcoffee !!!!!!!!
Last summer I honed in on #sourbeers in my #SummerofSours. ☀️☀️ THIS SUMMER ☀️☀️ I’m expanding to summer flavors of all kind!
MP 🔥Tip: I’m brewing this coffee 🥶❄️
It’ll have a 24 hour brew time and then we’ll taste all the notes of this medium roast chocolate covered maraschino cherry!
#coldbrewcoffee is different from #icedcoffee in the fact that the grounds brew in the water for a period of time, resulting in a very full flavor and is less acidic. Iced coffee is hot coffee then poured over ice and enjoyed. It’s not bad and rather nice. But there’s something about cold brew that is… magical. 🧊☕️
#coffeefiend #matzyplatzy #summerselections #coffee #maraschinocherry #chocolate olate

Enjoyed a little staycation out in Dripping Springs. If your ever in the area make sure to checkout @ghostnotebrewing @deepeddyvodkatastingroom @driftwoodestatewinery @saltlickbbq @fitzhughbrewing

I took him grocery shopping. I do enjoy when he joins me at the store! It’s the start of all the culinary adventures!
#groceryshopping #matzyplatzy #homecook #followme #curatedmenu #curatedstyle

MP Hot Tip 🔥
Check out @ghostnotebrewing for their crazy awesome beers! @kylewaylonloyd enjoyed the Southern Lite Mexican-style lager. I sipped on the amazing That Tracks Modern IPA made with Simco, Amarillo and Azacca hops! We both shared the Wild Cherry Sour, a three-year barrel-aged sour that’s definitely going in my all time faves of sours!
Ghost Note says this sour started out as a Pils and was aged in wild barrels of yeast and bacteria on Montmorency Cherry concentrate and then fermented on a mix of sweet and sour cherry purées. Just an all around well-balanced sour that lives up to its tart and funky description.
Give Ghost Note out in Dripping Springs, TX a try!
#beer #craftbrewery #sourale #getaway #texasbeers #texashillcountry #matzyplatzy

Real life, cleanup shot of dinner tonight. Some nights don’t yield those #onepotwonders. But that’s ok! It just means a few more dishes to wash after that yummy meal!
What’s your after-dinner shot look like?
#dishes #matzyplatzy #cleanup #dinner #homecook #homecookedmeals#reallife

We’re taking a break from the kitchen to enjoy some sun, fun & fam! Don’t forget to follow us and give us a ❤️. Happy Summer!

Summer Dish Highlight - Crispy Chickpea Chili Lime Salad 🥗 ❤️ & Follow us for more yummy mains!

Brunch at my favorite place @idaclairesa! Some #friedgreentomatoes, eggs over medium, ham steak, potatoes and probably my most favorite, country #biscuits with both gravy AND jam!
More ideas @matzyplatzy for ways to do brunch at home, plus other elegant and elevated meals quick and affordably!
#provisionspreparationpresentation #matzyplatzy #elevated #elegant #homecook #brunch #sundayfunday

Discovering… @pullmanmarket at the @historicpearl for the first time. It’s at the old Samuel Glass building and features a specialty grocer, butcher, sourdough bakery, chef supply shop, almost a half-dozen eateries and four restaurants. Pullman Market seeks “flavor first.”
It was our first time in…. Now it’s your turn to check it out and post your review here!
Where: 221 Newell Avenue, San Antonio
#matzyplatzy #provisionspreparationpresentation #homecook #sourdough #discovering #restaurant

Made a yummy Japchae via @joannagaines Magnolia Table v. 3. This Korean cuisine takes spinach, onion, carrot, mushrooms and gives it a little sesame oil bath each step of the way. The marinated steak and sweet potato noodles are tossed in a sweet twangy sauce. The result is a nice earthy, Asian-inspired dish with a satisfying crunch from the carrots with a very comfort food feel.
Will be making again! Simple enough for a weeknight dinner, filling for the whole family and (at least for me) leaves you wanting more!
#homecooking #japchae #matzyplatzy #asianinspired #koreancuisine

Smashed this burger on the grill for a really, really tasty smash burger. Onion powder, garlic powder, Worcestershire sauce, mustard powder, salt and pepper… sizzled on the @biggreenegg for a few minutes each side, topped with some Colby & Monterey Jack sliced cheese.
Classic and juicy.
#smashburger #grilling #backyard #outdoordinner #homecooked #matzyplatzy

A slice of home. Homemade crust. Homemade buttermilk pie. Homemade whipped cream and some (not homegrown) berries. I didn’t quite think I enjoyed it *that* much, but since my first slice I’ve been craving more! I think I’ve had three slices myself today!
Working my way through @joannagaines Magnolia Table V. 3 - dinners and desserts. But I have to say… the desserts are my absolute favorite. 🤩 😋
#matzyplatzy #pie #homemade #desserts #homebaked

A sweet chocolate crème brûlée to end a cold weekend here. Underneath the crunchy sugar shell lie a smooth chocolate custard made with a simmering heavy cream and sugar poured over semi-sweet chocolate chips, and then emulsified with egg yolks and more sugar.
Did someone say sugar? Well, you have to indulge every once in a while!
#dessert #matzyplatzy #homemade #homecook #kitchenlove #cremebrulee

Merry Christmas from the family! Homemade sourdough rolls comin’ at ya hot, buttery and so comforting. Happiness in a bite. 😋❤️🎄
#baker #madeathome #matzyplatzy #comfort #food #holidays #lovinfromtheoven

We baked up a fall-festive sourdough celebration. Kyle wanted to see if we could transform my signature sourdough into a pumpkin/gourd shape with just a few twine ties and a little prayer.
These two turned out better than I thought! Very happy with the result and so happy to be baking my sourdough loaves again. It tasted amazing cooled slightly and still warm with a slathering of butter on top! 😋
#signaturesourdough #sourdough #sourdoughbread #matzyplatzy #homebaker #bake

Now that Fall’s here, my Summer of Sours is coming to a close. What a fun summer that was! I got a good taste from across San Antonio, the Lone Star State, the Midwest, Nashville and beyond! I came to like sours on our trip a few years ago to Ft. Collins, CO. They’re not for everyone, and they can take some getting used to. But I love the variety of flavors, the different levels of sweet and tart, and their general refreshing nature.
From top left to bottom right in no particular order (all were so good!):
1) @2ndshiftbrewing Casual Experimentation, a Berliner weisse sour ale. 4% ABV. Saint Louis
2) @blacklaboratorybrewing Plumbus Berry Sour w//raspberry and plum. 5.5% ABV. San Antonio
3) @cactuslandbrewing El Pepino Loco with sea salt, Chamoy and cucumber. 6.5% ABV. Adkins, TX
4) @martinhousebrewing True Love, a kettle sour with raspberries. 5.2% ABV. Ft. Worth
5) @southerleighbrewingco Mangose & Sticky Rice, a kettle sour with mango and coconut.
6.6% ABV. San Antonio
6) @prairieales Blueberry Boyfriend, a sour ale with blueberries and lemon zest. 5.9% ABV. Oklahoma City
7) @blueowlbrewing Tropical Brut, a mango & açaí berry sour sparkling ale. 6.7% ABV. Austin
8) @martinhousebrewing Big Surge, a fruited kettle sour with coconut, lactose and vanilla. 7.5% ABV. Ft. Worth
9) @903_brewers Mangorita, a Berliner Weisse style ale aged on mango, lime and tajin. 7.5% ABV. Sherman, Texas
Not pictured:
@austinbeerworks Tropical Tuxedo with pineapple, lime, tangerine and mango. 4.8% ABV. Austin
@bluestarbrewco Brainstormer series sour (raspberry or cherry), a 2 year aged sour with organic raspberry/cherry. ABV 3.8%. San Antonio
@kuenstlerbrew Guava Goddess Gose with hints of strawberries, pear and pineapples. 5.4% ABV. San Antonio
@yeehawbrewing Blackberry Beret… a Berliner-style Weisse with, what else, blackberries! 4% ABV. Nashville

Ummmm…. Homemade fish sticks are the bomb dot com. Wow! Tilapia cut into sticks, seasoned and dredged in flour, egg wash and panko with grated Parmesan and lemon zest, then brushed with olive oil and baked til golden crispy! I made a tahini sauce to dip the fish sticks in, and cut up some zucchini, tomatoes and mushrooms for a roasted one pan Mediterranean veggie smash.
Ain’t gonna lie, it took some time but it was good and healthy!
#homecook #fishsticks #mediterranean #matzyplatzy #weeknightmeals

Meteorological fall is here and so is homemade #ragu! Let’s be honest though. Ragu anytime is amazing… it is truly my favorite. A little pappardelle pasta combined with a thick, hearty, flavor-packed, slow-simmered #soffrito sauce… this is heaven in a pot.
I tried this new ragu recipe from @recipe_tin and loved, loved, loved it.
Comfort doesn’t begin to describe ragu and I can’t wait for more of these this fall!
#comfortfood #homecook #matzyplatzy #fallweather #meteoroligicalfall

Homemade waffle cones for the win!

Homemade waffle ice cream cones (as well as coffee gelato). Inspo thanks to @joannagaines. I swear, homemade waffle cones are now my favorite thing to do! Crisp, light, tasty and just THE thing to beat this heat. If we can perfect the batter, the rest is a piece of cake. So far so good, and I love showing these off in the glass cookie jar on the island. Impressive and enjoyable.
#homemade #homecooking #wafflecones #icecream #beattheheat #matzyplatzy

We keep making these pizzas better each time! Made with one of our favorite homemade pizza dough recipes from “Pizza: The Ultimate Cookbook” by @barb.caracciolo (a quick rise dough), we topped these with fig, arugula, prosciutto, balsamic glaze and cheeses…. The other with ricotta, cured ham and pear. The fig pizza base is a homemade pesto, while the pear pizza’s base is olive oil and mozzarella.
Loving all things homemade, especially enjoyed with family and friends.
#pizza #homemade #dough #pesto #oliveoil #fig #pear #prosciutto #matzyplatzy #homecooking #homecook

Summer dishes are my favorite! Love to make these light, veggie heavy, bright flavor and tasty dinners.
This pasta primavera is from @twopeasandpod and features a delicious lemon cream sauce, lots of veggies like bell pepper, broccoli, summer squash, peas and asparagus, topped off with cherry tomatoes and basil.
So good!!!
#matzyplatzy #summercooking #veggielover #pastaprimavera #lemoncreamsauce #lightandbright #dinnerathome

Crepe me away! I got a @staub_usa crepe pan and now I’m practicing perfecting my crepes. For Father’s Day I made some sweet crepes, with the Crepes Suzette orange sauce + ice cream, a traditional lemon juice and powdered sugar, and Nutella with banana. So good!
This week I made a savory crepe with a creamy spinach mushroom filling. That wasn’t my favorite so I’ll need to keep trying.
#crepes #crepesuzette #fathersday #savorycrepe #matzyplatzy #homemade #cook

“Coronation Chicken Salad Sandwich” (@nytcooking) to commemorate today’s official crowning of King Charles III. This is said to have been the recipe that was used to celebrate Queen Elizabeth II’s coronation 70 years ago. The Times says this recipe was popular in Britain during its heyday in the 1980s - curry chicken salad with dried apricots, mango chutney and nuts.
I made a sourdough sandwich bread to go along with it. Delish!
#KingCharlesIII #coronation #chickensaladsandwich 🥰#sourdough #bread #baker #matzyplatzy #dinnerathome #saturday

Do me a favor real quick - give me a follow!
Pan de Cristal from the @sourdoughbrandon tribe. 100% hydration meaning way wet dough. This one came together rather quickly for fear that it would overproof. This used many of the same techniques from my regular sourdough loaves, starting with mixing 4 ingredients (flour, water, salt and leavin or sourdough starter) to folding during fermentation and proofing.
I might call this my “doubting sourdough” because you doubt it’ll come together at all at complete hydration. But it finally did and the results were gratifying. Each loaf produces 2 halves (or one complete sandwich).
While there are many ways to eat this, I think my favorite will be with butter and jam. Yum!!
Up next: I have 2 sandwich breads proofing because I’m planning a “Coronation Chicken Salad” sandwich recipe from @nytcooking to commemorate #kingcharles and his official crowning ceremony.
Stay tuned!
#bread #baker #breadismyfavorite #matzyplatzy #hydration #jam #pandecristal #dough #sourdough #chickensalad #sandwich

Getting ready for #Fiesta on this #MeatlessMonday with two meatless fillings: @gardein be’f and a nut, mushroom, cider vinegar, tamari and spice (cumin and chili powder) mixture.
I also made a vegan queso with bell peoper, cashews, turmeric and salsa. Topped the tacos with tomato, coconut yogurt, avocado and cilantro.
Tacos without meat never tasted so good!
Do you go meatless? Comment below and share your favorite meatless dish!
#tacoswithoutmeat #veganqueso #matzyplatzy #eatingwell #feelingwell #willmakeagain #dinner

Alright @thepioneerwoman gurlllll. Made this black bean burger and I’m like okayyyyy. Wow, never do I order a veggie burger out but maybe I should. Made the burger as written in The Pioneer Woman Cooks Dinnertime with black beans mixed with onion, egg, Panko breadcrumbs, hot sauce and topped with Swiss cheese.
Filling and not even missin’ the beef!
Comment below and tell me your favorite way to do a non-meat burger!
#veggieburger #pioneerman #pioneerwoman #dinnerathome #matzyplatzy #fries

I’m in a soup mood! Tonight I made a Tuscan Ribollita white bean soup which was the perfect use of my day old (well, four day old) sourdough loaf. The base starts out with red onion, carrots and celery til soft, then minced garlic is tossed in, followed by whole peeled tomatoes and veggie broth. Separately, some of the beans and soup mixture is puréed in a food processor and added to the soup after about 20 minutes along with the rest of the cannellini beans and kale leaves. Throw in a Parmesan rind and some herbs like oregano, thyme and salt.
The whole thing comes together at the end by scooping the soup over the toasted bread pieces with Parmesan cheese.
This hearty soup satisfied the heart and tummy! Yum!
#soup #ribollita #parmesan #matzyplatzy #whitebeans #sourdough

Bread making is my happy place! Here’s a boule in my new @lecreuset bread oven. I scored it with a half moon that made a great oven spring ear. The batard (oval) made for a really great looking bake with the “S” pattern score! Very happy with these results. And they tasted even better!
#sourdough #boule #batard #baking #homebaker #matzyplatzy #bread

Added a family member to the house ❤️ Gonna be fun making a sourdough boule in this tomorrow! Our house has been staunchly @staub_usa but couldn’t resist this @lecreuset bread oven tailored to the round side of bread baking! Let’s go!
#breadoven #boule #sourdough #homebaker #matzyplatzy


Proud of eating our homemade lunches lately instead of going out! This one was especially good… a revamp from the previous night’s dinner of chili lime burgers with air fryer French fries.
The revamp included just the patty for a protein-packed lunch over a bed of baby spinach & baby kale with some chopped red cabbage, avocado, tomato and a dressing of choice. For me that was Italian - for @kylewaylonloyd it was peppercorn ranch.
Wow, very impressed with how the meal came to life all over again.
What kind of meal revamps do you enjoy? How do you repurpose those leftovers? Leave a comment below and share your ideas!
#leftovers #leftoversdonthavetobeboring #homecook #lunch #favoritemealoftheday #burger #spinach #kale #avocado

Six loaves of bread were nestled all snug in their beds while visions of sugar-plums danced in their heads.
1 x Cinnamon Raisin bread
2 x Signature Sourdough loaves
3 x Sourdough Sammie loaves
The #cinnamonraisin is my first go at it courtesy @sourdoughbrandon and I went #allin using my trusty @brodandtaylor proofer. Very excited to see how this one turns out! One of the sourdough sammie loaves will provide a delicious #panini dinner tomorrow from @joannagaines #MagnoliaTable! #MeatlessMondays never tasted so good!
Now how many more loaves *could* I get in here?
#bonappetit #homecook #bread #baker #sourdough #sourdoughbread #proof #matzyplatzy

I made these mock Chipotle bowls that tasted JUST LIKE CHIPOTLE: green leaf lettuce, black beans, corn, tofu sautéed with paprika and salt/pepper, garlic cilantro rice with lime juice, pico Fresca (pre-made by H-E-B) and avocado slices.
Even with the extra firm tofu, these bowls rocked a hard core comparison to the real deal. Luke had seconds!!! (He never has seconds.)
I asked if he wanted it for lunch tomorrow and he said, “Sure” (which is a total endorsement from him).
Mic drop. 🎤
I feel like father of the damn year.
#chipotle #realdeal #chipotlebowl #tofu #meatlessmondays #pico #avocado #seconds #leftovers #micdrop

Been composting with @missioncompostsa since December. I really love the convenience with the small bin on the counter where I can place all my compostables from cooking. Every Thursday (on trash day) they come and pick it up and replace with a new one. It’s my little kitchen luxury to me more efficient and sustainable while cooking!
*this was not a paid endorsement*
#kitchencompost #sustainability #countertopcompost #convenience #compost #food #kitchen #luxury

Two meals, two types of cuisines, same kind of thickened base with different spices!
I think it’s totally cool how foods from different cultures still use similar processes. I made @meerasodha’s chicken curry which combines oil, cumin seeds, cinnamon sticks, onion, a spicy paste made in a mortar and pestle, tomato paste and yogurt. In this braised pork ragú from @nytcooking, (pictured) the base is comprised of oil, carrots, onion, garlic, tomato paste, cream and water. Two totally different tastes but both amazingly delicious.
I paired some tasty naan with the curry, and we made our own noodles for the ragú! Best of all, I got to make them in my new @staub_usa cookware. Enjoyed making these very much!
#homecook #matzyplatzy #dinnerathome #chickencurry #ragu #pork #nytcooking #noodles #naan #cuisine

Didn’t post last year’s Thanksgiving but here is this year’s. Such good food. Really great company with family and friends. The only downside was @sarahloyd’s illness which prevented her from coming to dinner. We got some dinner to her anyway and she’s on the mend, thankfully. She did make some dishes for us anyway (green beans and mushrooms and a really good vegan acorn squash dish).
I’m so happy the turkey also turned out well again. Had some ham and dressing as well from my mom, mashed potatoes from sis @robinloyd, yummy pies thanks to @sandy.loyd.54, @kylewaylonloyd and @mccumberrobin.
#Thankful.
#matzyplatzy #homecooked #Thanksgiving #rolls #bread #sourdough #turkey

After such a stomach-full last few days, I made this beet, avocado and goat cheese salad with walnuts with a tasty vinaigrette including olive oil, Dijon mustard, maple syrup, balsamic vinegar, salt and pepper. The roasted beets added warmth and color, with the goat cheese and vinaigrette giving it life!
#beetsalad #beets #goatcheese #postthanksgiving #walnuts #avocado #matzyplatzy #homemade #chef

I’m so thankful. When I have a fridge full of food that’s sometimes not so organized, I’m really thankful that we have enough to eat. When I go to work and sometimes assignments are hard, I’m thankful to be employed. When I spend too much money, I’m thankful to have a few extra bucks in the bank to cover it. When I’m mad at a family member, I’m grateful that they are in my life and put up with me. When I have to get up at 5 something in the morning to take Luke to school for practice, I’m so thankful to have a healthy, vibrant, funny kid for a son. When I’m enjoying holiday games where I win with my awesome game partner and MIL Robin McCumber, a crisp dirty martini makes me feel so lucky and happy. ❤️🦃

Doggie pumpkin pie.

Sourdough dinner rolls from the one and only @sourdoughbrandon! I made these beauties for our work Thanksgiving lunch and let me tell you, they were a hit.
It goes to show HOW IMPORTANT proofing is. And not just proofing - properly timed proofs. I made a batch of sourdough dinner rolls before this one - using a different recipe and I never got a rise from the dough. There are a ton of factors that go into a good outcome so I can’t say for sure. But the mixing and proofing are important. I went ahead and baked the others anyway. They were dense but still not bad as far as taste. When it comes to a roll that’s as soft as a pillow, though, this is the one I’ll stick with! Can’t you just smell them now?
#matzyplatzy #dinnerroll #sourdough #homemade #baker #baking #bread #cozykitchen #satisfaction #sourdoughstarter #tim

Baking class making quintessentially French pastries around the "Eclairs" & "Choux" categories : Eclairs Chocolate, vanilla and coffee, and petite “Chouquettes” from the left over choux dough. C’est bon!

There’s a little soirée happening at this apartment across the way from us. I am enamored by visiting places and being witness to life happening whether I was here or not. They are having a grand time. Many cigarettes, tons of loud conversation, countless glasses of wine. Weekend vibes. Connections. Paris.

I love these boots. I put them away under pressure. But I’m bringing them back for a fun adventure. Here we go! 🌎

You are what you eat. What are you?

Homemade hoagies from @ohsweetbasil. Haven’t had them yet (a meatball sub is in their immediate - tonight - future). The rise on them was out of control. A very quick dough that resulted in a wonderful bun! Stay tuned for the meatball sub pics!
#hoagie #meatballsub #subsandwich #bread #baking #breadrise #homemade #matzyplatzy

Instant gratification is usually meant as negative and self-serving. My question is can it also be used when describing doing all the dishes after dinner because you don’t want to take the time to put them in the dishwasher, waiting however long it takes to fill it up (maybe the following day) and then having to unload all those dishes? It’s not like I *want* to stand there and do all the dishes, but it’s also nice just to get it done. And it’s not like INSTANT. It’s like, 15 minute gratification. 🤷♂️

I was just thinking how, when I order a croissant at a bakery, and I request butter and jam, I get a weird look.
It’s probably because a croissant is nothing but butter hiding in a little bit of dough.
What? I like butter.

Sometimes he pushes my buttons. Sometimes he pushes by basket.
I am glad he’s mine to do both. ❤️

A really yummy version of beef ragu made in the faithful @instantpotofficial. This recipe comes courtesy of @themodernproper and incorporates hearty chuck roast, stewed tomatoes, onions and carrots, garlic, beef stock, and the secret spices that raise the bar on the dish - allspice and cinnamon!
The recipe suggests serving over polenta, zucchini noodles, or pasta. I went for pappardelle.
Now, on the term ragù. Having had an Italian exchange student before, we’ve tasted authentic bolognese cooked by an actual Italian. Ragù is a broad term for an Italian sauce. A bolognese is a type of ragù but ragù does not necessarily mean it’s a bolognese sauce.
Any way you put it, it’s all delicious!
#ragu #pasta #bolognese #italian #pappardelle #homecooked #homemade #matzyplatzy

No filter flaky buttery croissants.

My first attempt at croissants all on my own. I feel like… well they smell absolutely amazing. They look… ok. But the lamination did not go really that well to seal the butter in the dough. I ended up with shards of butter instead of a smooth butter block inside the dough.
The folds went just okay. Could have done better to keep the dough shaped. Some of it tore with “blowouts,” where the butter pops out of the dough. During the bake the butter was leaking out quite a bit.
So far they seem pretty flaky as I handled them to put on the cooling rack. Stay tuned.
#croissants #homemade #matzyplatzy #baker

When it’s an 84° Texas evening, beef stew will only do to warm you right up when it gets chilly out.
#fallfood #chillyout #texas #warmup #beefstew #matzyplatzy #homemade #pretendingitscold

A delightfully tasty lemon zucchini bread iced with… wait for it… more lemon!!! I am quite jazzed about this flavorful and vibrant treat. The recipe comes courtesy of @twopeasandpod and I have loved everything from this site. Mmmmmm!!!
#zucchini #zucchinibread #lemon #matzyplatzy #homemade #baker

Hubby’s homemade peach pie… practicing that dough with a family recipe. End of summer pies are the best, and I swear it’s gonna get even better when he starts on my #birthday #strawberrypie soon! I got him a big ole 5 lb bag of frozen strawberries for just the occasion! Always had a strawberry pie for my birthday. 🥧🍓❤️
Can’t wait!
#summerbaking #matzyplatzy #peachpie #birthdaytreat #husbandbaker #homemade

Homemade grilled cheese sandwiches are off the hook! Did I mention this was on sourdough sammie bread I made? ;) Tried a homemade tomato soup for the first time thanks to @bakingmischief. Perfect on a soggy day. Wow. So impressed.
#honemade #grilledcheese #tomatosoup #matzyplatzy #gouda #gruyere #grilledcheesecreations

Got back to it tonight with these two beauties. So satisfying ❤️

Tried my hand at pickling - not canning - some root veggies like carrots, 🥕 beets, rutabaga, red onion and some green beans. I used a combination of vinegars including white, apple cider, rice and red wine. Excited for them to turn out yummy, and go along side #bao (steamed buns) filled with pulled pork later this week! Plus, they just were gorgeous!
#homemade #pickledveggies #matzyplatzy #rootvegetables

Matcha ice cream, a Japanese dessert made with matcha, an earthy, grassy green tea powder. It combines a savory matcha flavor with the sweetness of chilled cream. It went along perfectly with our homemade sushi 🍣 and veggie tempura 😋
#matcha #icecream #japanese #dish #sushi #tempura #homemade #matzyplatzy

Took a trip to Sweden… well, IKEA… well really it was just home… to have these delightful Swedish meatballs, mashed cauliflower with Parmesan (that killed the blender before we brought it back to life), and a cranberry relish. Felt like I was right there in store shopping for our next home purchases! Yummy!
Took a bit longer than I like on a weekday but the taste paid off. Gonna be on the repeat list.
#swedish #meatballs #mashedcauliflower #cranberryrelish #ligonberrysub #homemade #matzyplatzy #homecooked #dinner #flavor #doityourself #ikea #repeatlist

My latest sourdough loaf (last week) in that obligatory sourdough pose. #nofilter #sourdough #bread #baker #homemade #matzyplatzy

Tried my own recipe after experimenting with a few others dozens of times. I even did it from just memory (mostly) and used various techniques that have worked for me. I feel like I got a very decent result for having done my own!

Sourdough trifecta. The two on the cooling rack are from my @nytcooking recipe with modifications to the flour content and hydration. The third loaf is one that I made up using techniques I’ve learned and ingredients and percentages I thought wound work. They are all 65% hydration. The two on the rack are all white bread flour. The other has 50 g of whole wheat.
I’d say they all are successes! Very pleased with each…. it proves no two turn out the same.
🍞🥖🍞🥖
#sourdough #bread #wearebread #matzyplatzy #homemade #dough #loaves #notwoloavesarethesame #breadislife #finalproduct #baker

Homemade sourdough hot dog buns! At first the dough felt a little too wet. But it was pretty simple: combined the ingredients, kneaded in the stand mixer, let rise for about 8-10 hours, and then put it in the fridge for a long fermentation and proof.
When I got them out and divided, rolled and left to rise, I didn’t think they were big enough. But I might have misjudged… I think perhaps next time I’ll make them a bit smaller. They rose nicely in the oven, baked golden brown and cut really, really well for the hot dog slot.
Love making homemade!!!! Winner winner hot dog dinner ;)
🌭🌭🌭🌭🌭🌭🌭🌭🌭
📝 @farmhouseonboone
#matzyplatzy #winnerwinnerhotdogdinner #hotdog #homemade #sourdough #sourdoughbread #hotdogbuns #standmixer #dough #doughdaddies

No filter just trying to get better. Bread is life is bread.
#sourdough #bread #breadislife #baking #homemade #matzyplatzy #homebaker @nytcooking

Summer looks good on you. ☀️

Getting our grill on!!!!!!!
#Grilling #Ribs #matzyplatzy #arteflame #wings #homemade #summer

Never had a stuffed avocado before! Mixed with mozzarella balls, tomatoes, olive oil, basil, salt, pepper, garlic and a balsamic glaze, this lovely vegetarian summer dish was easy, filling and flavorful! (And no cooking!)
I paired with a chocolate shake with cocoa nibs, almond milk, coconut milk, peanut butter, vanilla extract, cocoa powder and Swerve sweetener.
#matzyplatzy #stuffedavocado #chocolateshake #vegetarian #summerdish #summermeals

Baked #2 today, the second loaf from the @nytcooking dough I began two days ago.
I kept #2 in the fridge a day longer, where it spent maybe 36 hours cold proofing, compared to about 18 hours for #1. Everything else was the same. 68% hydration, white bread flour mixed with a combination of spelt, whole wheat and rye flours. I baked #2 at 500° covered for 20 minutes and 450° uncovered for about 18 minutes.
#Drumroll: I think #2 is a bit lighter with more air pockets and slightly more flavorful. I’m impressed with both, however, and think that this recipe delivered from the dough, proofing time and texture to the oven spring, taste and overall presentation.
Can’t wait to make another!
#matzyplatzy #oven #homemade #homebaker #ovenspring #texture #finishedproduct #bread #sourdough #happybaker

Another day, another sourdough. But I’ve been excited about this one. Started yesterday, this is the sourdough from @nytcooking. I followed it to the T in every step of this process except with hydration. Rather than 750 g of water - for 75% hydration to the 1,000 g of flour - I lowered the water content to 68% (or 688~ g of water). This is based on past experiences with hydration and dough too wet to shape and therefore results in no (or hardly no) oven spring.
Additionally, I took care in watching the bulk fermentation closely. The recipe allowed for a “built in” close watch as I folded every hour for about 4 hours or so, all the while watching it rise and become fluffy, airy and light “like whipped cream.” I did put it in the @brodandtaylor proofer for about an hour/hour and a half.
Finally, I baked this first loaf (it was divided into two for two separate loaves) today and I’ll bake the other one tomorrow. I want to compare the tangy sourdough flavor that comes with extra cold proofing time the second loaf is expected to have.
I baked this at 500° for about 23 min covered and went another 17 or so minutes at 450° uncovered. I was scared to over bake it but I feel like this color is pretty characteristic of sourdough and honestly I think it looks spectacular.
Cheers to another sourdough loaf!
#matzyplatzy #homemade #baker #sourdoughbread #newrecipe #breadhydration #bulkfermentation #trialanderror #summerbaking

Today’s sweet summer treat is a tasty and tart strawberry gelato! Fresh strawberries combined with milk & cream, lemon juice, sugar and lots of love really makes this dessert shine! @kylewaylonloyd cranked this one out. Thanks Bubby!!!
We’ve been experimenting with ice cream this summer courtesy of the @kitchenaidusa #icecreammaker attachment. Ice cream flavors like plain vanilla, Butterfinger, and cookies and cream all turned out amazingly well! This gelato recipe turned it up a notch with an explosive flavor profile!
Many ask the difference between gelato and ice cream. There are a few. Gelato is supposed to be denser and more flavorful. Some ice creams also use eggs, and gelato does not. Gelato means “ice cream” in Italian, and it’s supposed to not have as much air - hence the density part. Gelato uses more milk than cream.
We are gonna make some peach ice cream next and I can’t wait for that. There’s nothing more summertime for me than peach ice cream! Can’t wait!
#icecream #summertreats #frozenfavorites #peachicecream #butterfinger #cookiesncream #matzyplatzy #homemade #gelato #italian #tart #summer

A crunchy-on-the-second-day sweet sigh of success sourdough loaf. This one is pretty low hydration but I did up it from 50% to 60%. It wasn’t as tangy as the 50% one.
-500 g bread flour
-300 g water
-150 g starter
-10 g salt
Pretty standard technique and still working to perfect but this one turned out well. To achieve the crunchy crust, I employed a few ideas like spraying the batard before baking, baking it longer (40 min covered at 450 and 20 min at 400 uncovered). I also let it cool inside the oven a bit.
📝 Recipe: @theclevercarrot
#matzyplatzy #sourdough #baker #batard #sourdoughbread #homemade #hydration

Sourdough lemon and blueberry scones made with sourdough discard. I mean, does it get better than this?
NO!
Thanks to @home_grown_happinessnz for this recipe. What I really love about these scones is the pop of lemon zing brought to us by some #lemonzest. Plus, these are not so hard and crunchy you can’t chew them. I’ve had brick scones before. These are quite fluffy and soft.
The recipe finishes with a lemon and powdered sugar glaze drizzled atop these babies.
The only thing to perfect is the scone shapes as I don’t have a scone pan. But, perfection is in the imperfections. And the taste here brought it home.
👨🍳
#scones #blueberry #breakfast #baking #sourdoughdiscardrecipe #sourdough #baker #kitchenlove #oven #matzyplatzy

Three loaves from this week:
(Vote for your fave!)
1. @sourdoughbrandon recipe (darker loaf/first pic).
70% hydration - 440 g flour including bread, rye and whole wheat; 310 g water.
2. @alexandracooks recipe (lighter loaf/second picture).
68% hydration - 500 g bread flour, 340 g water.
I used about 61 g starter in each. For #1, I performed an #autolyse according to instructions and for #2 I combined everything including salt at the beginning with no autolyse. I don’t like #coilfolds so I did the stretch and fold method for each. Used @brodandtaylor proofing box for the bulk fermentation, and then stored each in the fridge for two days.
Baked each at about 35 minutes covered (450) in the @challengerbreadware pan, uncovered (400) for about 10 minutes.
Results: I feel like I got a nice oven spring on each. They looked similar to each other and had plenty of nice sourdough pockets inside. The bread cooled and while they had a nice crumb on top, the bread had a little give/soft when pressed with a still-crunchy crust.
3. The third recipe is from @theclevercarrot. This one is a low hydration vs. the two high hydration loaves before. Here we have 50% hydration with 500 g bread flour and 250 g water. I used 150 g of active starter and something the other two did not have - olive oil at 25 g according to the recipe.
This recipe had an autolyse of half an hour, and I began a stretch and fold in the morning around 7:30 (the starter was fed the night before and ready to go). I left this one to rise in the bulk fermentation all day in a container on the stove (no bread box proofer) while at work so I got home with the dough having risen about 100% vs. only 50% or so first rise in the previous two loaves.
Around 6 p.m. I shaped and left to rest an hour, finally putting in the fridge that evening. I baked this one the next day vs. a two day cold proof at 450 degrees for about 30 minutes covered and another 10ish minutes uncovered at 400.
Result: good oven spring but not as good as before… and this one turned out much crunchier. Same great sourdough taste that they all have, but fewer traditional sourdough pockets!
Might try upping the hydration just a bit next one.

The other half of our “flour and flowers” stop included this GORGEOUS arrangement that MY MAN put together to spruce up the house. Wow. Gorgeous bouquets that @central_market had on hand, with our favorite new #florist at the San Antonio location, Claire!
This beauty really gave us a summer spirit lift!
#summer #summerflowers #happy #beauty #centralmarket #soul #matzyplatzy

Today I felt a little emotionally drained and stopped at @central_market for some #flour and #flowers. Grocery stores are my amusement park so it picked me right up. Shoppers out for their Saturday finds and the atmosphere just make me incredibly happy.
Came home with a little more than flour and flowers. Bought some #sweetcorn and jam ice cream we tasted in store, with some peaches and blackberries. Wow, so, so good. Those tasty summer flavors.

So good it deserved another photo!
#icecreamcookiesandwich #matzyplatzy #homemade #summertreats

Yes, please! Ice cream cookie sandwiches, the heart and soul of my summer! Secret ingredient: freezing the cookies after baking so they were firm enough to handle the ice cream. They were crunchy and sweet. The perfect treat to beat the heat.
#matzyplatzy #summertreat #icecreamsandwich #cookie #chocolatechipcookies #homemade

Cookies baked for the chocolate chip cookie ice cream sandwiches.
Now to freeze so they can hold up when adding ice cream!
#homemade #cookieicecream #matzyplatzy #bigcookie #delicious #bake #makeathome

Elton turned 1. HBD!
🐾🎂🥳

I post this ugly one as a public service announcement. Like me, my sourdough is a work in progress.
Tastes good, though.
#matzyplatzy #sourdough #workinprogress #notalwaysperfect #keeptrying #tasty #bread #noovenspring #ugly #bakersnightmare

Light, bright and delicious summer dinners continue at our house with this absolutely tasty #cobbsalad. My favorite part… well, two favorite parts… are the dressing with white wine vinegar, lemon juice, garlic, Dijon mustard, red pepper flakes, salt, pepper, a sweetener of choice (I used @swervesweetie) and 1/3 cup of #EVOO; and of course the #bluecheese!
I used some chicken I had on hand and also threw in some leftover #steak from last night’s @arteflame feast.
Had the Cobb salad with spinach leaves, a bit of bacon (again from last night), hard boiled eggs, tomatoes and some awesome avocado.
This dish is the epitome of a cool summer dish, and wow, very filling.
Will put this on the #repeat dinner rotation.
#summerdish #matzyplatzy #dressing #yummm

Operator error. Had about given up on the #Arteflame grilling experience. Practiced tonight on a #ribeye and #stripsteak. Also grilled up some delicious #sweetcorn and #brusselsprouts with #bacon topping it off.
I used a dry rub of smoked paprika, brown sugar, salt and pepper for the ribeye and a #Kentucky wet rub I saw online with butter, vinegar, Tabasco, cayenne, salt and pepper for the strip steak.
We grilled the food and man, all of it tasted amazing. After dinner we got up and noticed the flame going strong on the Arteflame. Apparently we didn’t wait long enough for the wood to also get going after the charcoal had ashed over. Yes, newb grillers here, okay.
Either way, it smells AMAZING out here.
#grilldaddies #steak #dryrub #wetrub #newbs #matzyplatzy #outdoorcooking #summervibes #operatorerror

Checked out Spice Grill and Bar (220 Broadway) downtown for lunch. This chicken vindaloo really packed a punch with flavor and wonder! The spice level goes from 1-5. I got the 2 and it was already pretty spicy - and I love 🔥
Also had a garlic #naan plus veggie pakoras, crispy and fried.
Beautiful traditional Indian dishes and a wonderful experience here with a great friend and dear colleague, @becca.2177
😍😍😍
#Indianfood #downtownlunch #sanantonio #downtownsanantonio #matzyplatzy #packapunch #flavor #spice #vindaloo #spicegrillandbar #yummy #veggie #pakoras #garlic #favoritemealoftheday

Summer eats! Making some less complicated and most importantly cool dishes that help us from overheating in Texas summer. It’s fun to come up with alternate menu options and give me a little break at dinner time… while staying cool.
So far, whipped up a very extremely flavorful, yummy bright and vibrant #gazpacho, #avocadotoast with chickpeas, harissa, and feta, #grilledcheese, and finally #chalupas! Love some chalupas! Used to be a weekly family favorite growing up.
#matzyplatzy #summermeals #coolinthekitchen #differentmenu #summer

We got that summer feeling. And just knowing that beneath his stoic nature is still that kid who laughs and finds humor in random things makes my heart melt. He’ll always be my boy. I love him so much. ❤️

Sourdough sammie bread grilled cheese! Need I say more?!?
#homemadebread #sourdough #grilledcheese #gooey #dinnerathome #matzyplatzy @sourdoughbrandon

The cyclist’s cup holder while camping.

65 miles today… done! We are at 252.68 miles ridden total so far. 65 felt like a break from the long first two days, honestly.
We did the Quadbuster, a steep 1.3 mile incline that seems to go on forever. The stop in Bradley at the school was fun and a nice way to support the students!
I think the ride also gives me time to reflect a ton, hear over perspectives, appreciate people more, and be better self aware. I am thankful for this moment with Kyle and grow in our own space and place in time. Being open to accepting love is hard sometimes.
Tomorrow is a big day: The Evil Twins and Half Way to LA! And I just looked - 91 miles 😬
Please 🙏 for us.

106 miles down the road and I’m pretty exhausted! Tonight we’re in King City and already chilling in the tent after dinner. 187 miles between yesterday and today so that would make 358 miles to go. Highlights today were the fried artichokes, sitting at the lunch table coincidentally where outgoing LA LGBT Center CEO Lorri Jean was sitting. She’s the queen of this ride so it felt like having lunch with a celebrity. We rode pretty hard in many places and the extended
mileage helped increase our average speed from around 10 mph early on to 15.3. It’s easy to decrease that average and so hard to increase! I felt good about that!
The people who gave to my campaign really make this entire ride and community possible. I was chatting with someone about that today. It’s easy to say this is just a ride. A pretty epic one, but a bike ride nonetheless. Instead, it’s a really large community of people from everywhere! Other countries and states. I told him that this year I raised money for AIDS/LifeCycle but also for our own San Antonio AIDS Foundation (SAAF). You come to realize that people have been impacted in one way or another by the epidemic, or they are here like me to try and make a little difference. The two years away from Lifecycle can make you forget the community. But it’s here and rocking this week, and always. I’m lucky to be a part of it… thank you.
Tomorrow… 65 miles to Paso Robles and the infamous Quad Buster hill. Plus, we stop for burgers in the town of Bradley where the school sells food to fundraise for their fine arts program. I heard that the one day Lifecycle rolls through town, it supports their fine arts program for a whole school year!

This is the best thing since…. well, sliced bread! Homemade sourdough sammie bread. Wow!
Yes, that is a little nibble from the corner of the slice. I had to try it first before I could post how awesome it is!
#bestthingsinceslicedbread #sourdoughsammie #sourdoughbread #baker #bake #breadloaf #loaf #matzyplatzy #proof #bulkrise

Super happy about my very first sourdough sandwich bread! This recipe comes courtesy of @sourdoughbrandon. It was such a delight to make, and also very satisfying from the dough to the final proofing. Seeing it rise in the loaf pan just before popping it in the oven gave me a good idea what to expect but it really exceeded that.
We are gonna try some grilled cheese or turkey sammies with it and I cannot wait!
#sourdough #sandwichbread #loaf #bulkrise #proofing #dough #bread #baker

Maybe a year ago, when we moved into our new home, we had the idea of having a family portrait commissioned that would capture us. @[100000271107381:Kyle] knew this artist who he met 20 some-odd years ago and had admired the abstract nature of his pieces. I looked him up on Instagram and friended him, and soon I got the chance to become friends with him, too. Life and jobs intervened for a bit, but the wait was worth it. Tonight the amazingly talented @[738783025:Eric Fonseca] personally delivered this masterpiece.
We are in love with it!
Kyle says it depicts us perfectly: Elton looking mischievous, maybe about to jump on the table; Dobby is timid, unsure of things around him; Kyle grinning ear to ear, enjoying the moment; Luke with a witty smirk on his face; and, as Kyle said, me with an in charge presence who put the evening and meal together complete with noodles - Luke’s favorite - and delicious beer (probably from @[391261024346770:Southerleigh Fine Food & Brewery]).
It’s so, so good. Coincidentally, it fits in with our theme of “the table” that we had at our wedding. All are welcome.
I’m so happy and can’t thank Eric enough for this addition to our home. 🖼🖌🎨

I call this batch “Beauty and the Beast.”
Same recipe. Same measurements. Same proofing times.
The difference was the one on the right proofed in the first bulk rise until it reached 50% rise (not double in size - the recipe says that the more it rises the weaker the dough becomes). When it rose 50% the dough was still very wet.
I took the one on the left out at the same time as the other so they could be on the same schedule. The left one had not risen to 50% and wasn’t soft and wet, but instead dry and taut. I thought it was not gonna turn out.
But just the opposite. The dry one turned out gorgeous. It was much rounder than my others - I love its shape! The wet one that rose more turned out flat like a frisbee!
What a weird batch! Any thoughts?

Any takers? #homemadesourdough
View more